From D2000 version v12, the installation program is available for the operating system Raspbian for Raspberry PI platform (models 2 and higher) and for computers built on Raspberry Compute Module (for example, Techbase NPE X500 M3 inudstrial computer).
A full D2000 system image for Raspberrry PI can be for simplification directly downloaded from https://d2000.ipesoft.com/download/#raspberry (950 MB, after unziping 3.5 GB). The image does not contain a graphic interface (to keep the image small), but it can be installed.
To obtain the D2000 installers for Raspberry PI platform and to obtain the images for the Techbase NPE X500 M3 industrial computer, please contact Ipesoft sales department.
Installing and configuring the image for Raspberry PI:
- Download the system image from https://d2000.ipesoft.com/download/#raspberry and unzip it.
- Insert a free micro SD card with a size of at least 4GB to the card reader for transfer of the image.
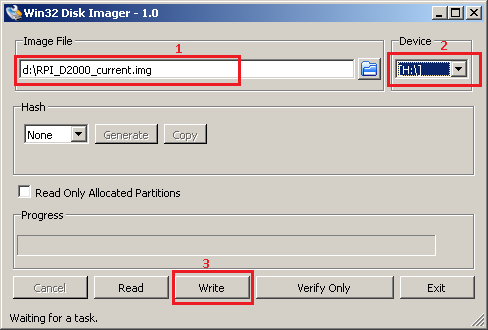
- Using the Win32DiskImager utility (in the Windows environment) or using the command dd (in Linux) copy the image to a micro SD card.
Figure: after running Win32DiskImager, simply select the downloaded image (1), the target micro SD card inserted into the card reader (2) and write the image to the micro SD card with Write button (3). - Insert the micro SD card into the Raspberry PI and connect the power supply. Raspberry PI boots from the SD card.
- Log in as the default user pi with password raspberry (for security reasons it is recommended to change the password).
- run a command:
sudo raspi-config
to start Raspberry Configuration Tool. In the menu, select "7 Advanced Options" and then "A1 Expand Filesystem". Confirm "OK" and select "Finish" from the main menu to exit the tool. Select reboot. Upon reboot, the file system expands so it can use all the free space on the micro SD card. - after reboot and repeated logging in as a user pi identify the IP address and a network mask with a command:
ifconfig eth0
Example of listing in which the IP address 172.16.0.108 and the network mask 255.255.0.0 can be seen:
eth0: flags=4163<UP,BROADCAST,RUNNING,MULTICAST>  mtu 1500
        inet 172.16.0.108  netmask 255.255.0.0  broadcast 172.16.255.255
        inet6 fe80::d2bb:4bde:c49a:5f97  prefixlen 64  scopeid 0x20<link>
        ether b8:27:eb:a7:f2:5e  txqueuelen 1000  (Ethernet)
        RX packets 5175309  bytes 748932223 (714.2 MiB)
        RX errors 0  dropped 92287  overruns 0  frame 0
        TX packets 1726640  bytes 739692537 (705.4 MiB)
        TX errors 0  dropped 0 overruns 0  carrier 0  collisions 0
Note: If you do not have a DHCP server on the network (or if you want to use a fixed IP address), set the fixed IP address and network mask by editing the /etc/dhcpcd.conf file.
To insert the IP address and network mask into the /opt/d2000/instance.properties configuration file, edit it with the command:
sudo nano /opt/d2000/instance.propertiesChange the IP address in the row
IPAddr1 = 172.16.0.108
and mask in the row
IPMask = 255.255.0.0
If you have configured a WiFi interface, you can also edit the line with IpAddr2.Save the file with the keyboard shortcut Ctrl+O and exit the editor by pressing Ctrl+X.
Standard Raspberry PI does not contain a real-time clock (RTC). If your Raspberry PI doesn't have access to preconfigured NTP server (212.82.32.26 t.j. darkstar.sanet.de), then you have to specify a custom NTP server:
sudo nano /etc/systemd/timesyncd.confEdit the row in the [Time] section with the NTP server IP address and enter IP address of a custom NTP server:
NTP=212.82.32.26
Save the file with the keyboard shortcut Ctrl+O and exit the editor by pressing Ctrl+X . Restart the NTP server by the command
sudo systemctl restart systemd-timesyncd
Shortly, the date command should display the current time.
- Then restart Raspberry PI by command
sudo reboot - The installation includes the D2000 with preconfigured application myapp. You can log in remotely using D2000 HI, D2000 CNF, GrEdit, Sysconsole, etc. using a default name and password (SystemD2000/SystemD2000), which we also recommend to change. When running the tools, it is necessary to specify the parameter /S<ip_raspberry> e.g. /S172.16.0.11
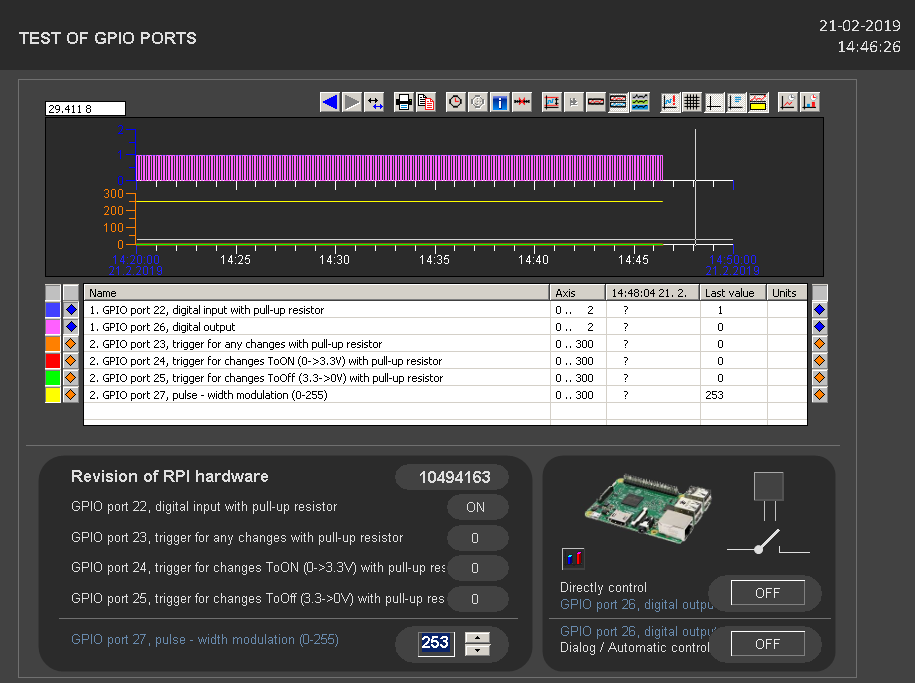
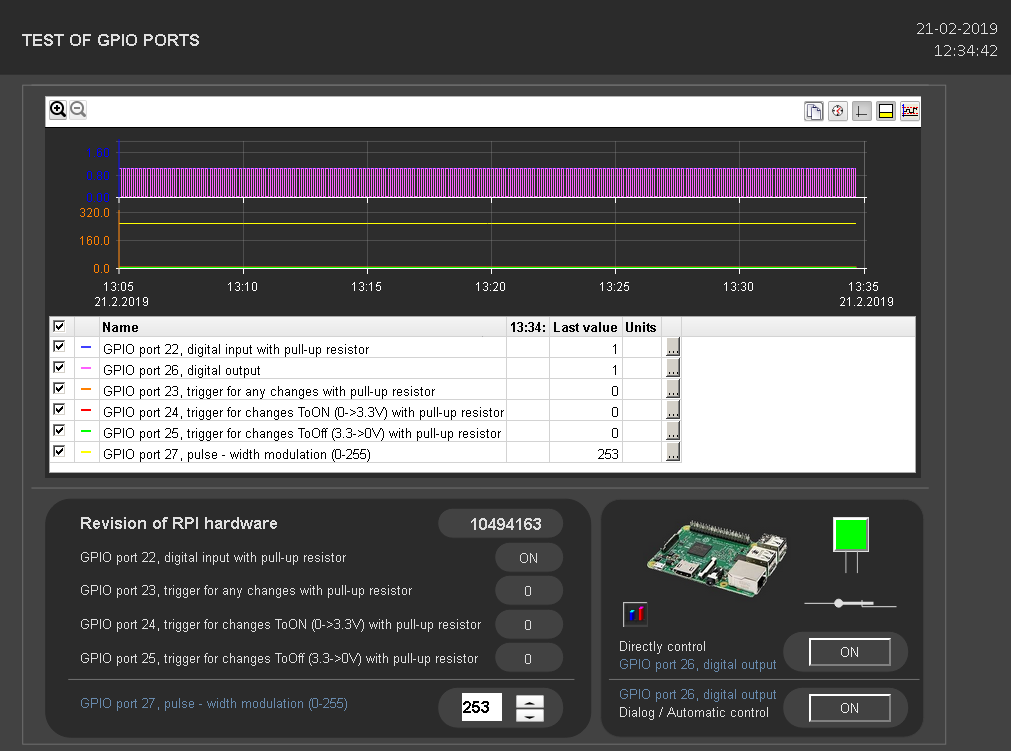
- After signing in to the D2000 HI, the default scheme S.RPI_main is automatically opened. The statuses of the configured I/O tags are displayed in the scheme:
| I/O tag | BCM pin | Description of configuration and functionality (for identification of BCM pins see https://pinout.xyz) |
|---|---|---|
| M.RPI_22_DI_UP | 22 | The pin configured as a digital input with a pull-up resistor (unconnected is 1, after connecting to the ground 0). |
| M.RPI_23_TRIGGER_UP | 23 | The pin configured as a counter of signal changes with 100-ms filter with pull-up rezistor. The trigger measures number of rising and falling signal edges (0V→3.3V and 3.3V → 0V). |
| M.RPI_24_TRIGGER_UP_TOON | 24 | The pin configured as a counter of rising edges with 100-ms filter with pull-up resistor. The trigger measures number of rising signal edges (0V→3.3V). |
M.RPI_25_TRIGGER_UP_TOOFF | 25 | The pin configured as a counter of falling edges with 100-ms filter with pull-up resistor. The trigger measures number of falling signal edges.(3.3V → 0V). |
| M.RPI_26_DO | 26 | The pin configured as a digital output (values True sets at the output to 3.3 V, value Frue sets at the output to 0 V). |
| M.RPI_27_PWM | 27 | The pin configured as a pulse-impulse output whose width is configurable by writing a value (values 0-255 correspond to 0-100%) |
| M.RPI_REVISION | - | Returns the value of the hardware revision (number from "Revision" row, from file /proc/cpuinfo). |
The outputs of M.RPI_26_DO and M.RPI_27_PWM can be controlled (after connecting e.g. LED diodes to respective pins it is possible to see their flashes (pin 26) or change of LED's brightness (pin 27).
The output M.RPI_26_DO is in the automatic mode, it changes every 5 seconds according to the calculated trigger.
The transition between manual and automatic control is possible through the control dialog, which opens after clicking on the top button from two identical buttons labeled "GPIO port 26".
Switching the 0/1 values can also be conveniently done via the lower button.
The M.RPI_27_PWM output can be controlled directly by entering a value or by clicking on one of the up/down arrows.
The scheme also shows a chart with time trends of the individual I/O tags that are read from the D2000 Archiv.
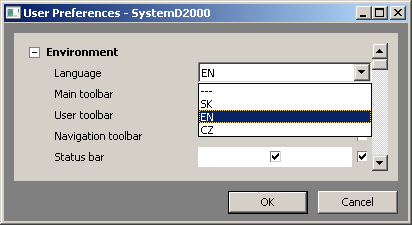
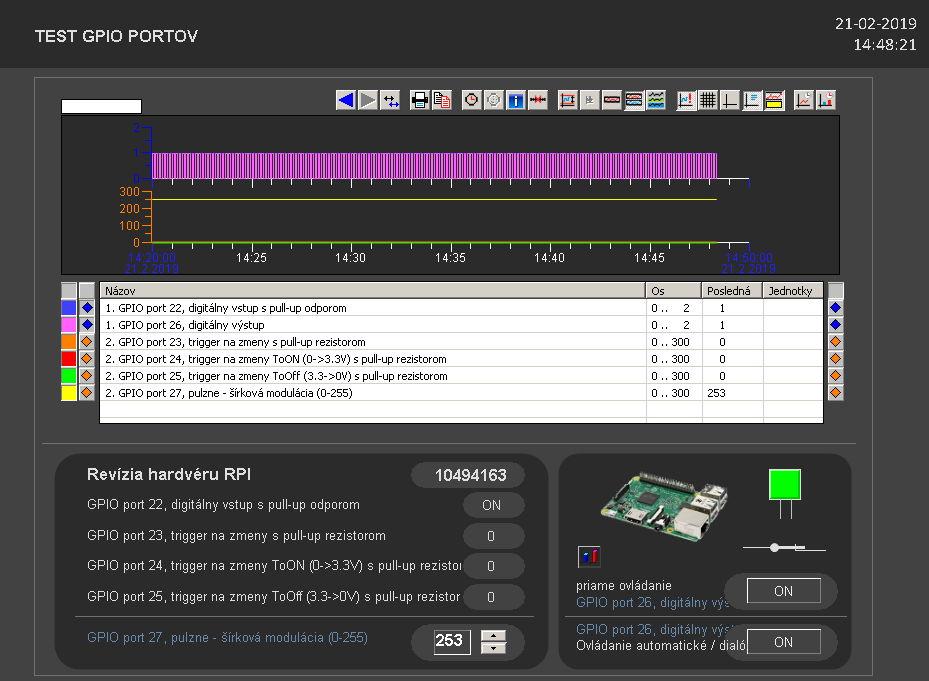
The schema is by default displayed in English, in the System → User preferences menu it is possible to change the language by changing item Language from EN to SK or CZ.
Subsequently, both the interface and schema content are displayed in the selected language:
The D2000 installation does not include a software license key, so it works in DEMO mode (restart every hour). To enable time-unlimited DEMO operation, allow D2000 to send diagnostic telemetry to Ipesoft. To enable the telemetry, edit this configuration file /opt/d2000/instance.properties and set following values:
enable the telemetry
InstanceConfig.DiagCollect.Enabled = 1
if you use direct internet connection
InstanceConfig.Proxy.ProxyType = 0
if you use proxy
InstanceConfig.Proxy.ProxyType = 2
enter <proxy_address> and <proxy_port>
InstanceConfig.Proxy.ProxyAddress = <proxy_address>
InstanceConfig.Proxy.ProxyPort = <proxy_port>
if the proxy server doesn't need authentication
InstanceConfig.Proxy.ProxyAuth = 0
if the proxy server needs authentication
InstanceConfig.Proxy.ProxyAuth = 1
enter < and user_name><user_password>
InstanceConfig.Proxy.ProxyUser = <user_name>
InstanceConfig.Proxy.ProxyPassword = <user_password>
If you are interested in generating a license key, please run /opt/d2000/bin/hwinfo. A file named info_<computername>_yyyy-mm-dd.hwi (e.g., info_raspberrypi_2018-09-13.hwi) will be created, based on which the license can be generated.
Then copy the license (LicenseRun.code file) to the /opt/d2000 directory and restart D2000.
Additional Notes:
- The myapp application also includes the sqlite.ARC process that has the autostart disabled. This archive process has an experimental SQLite3 database configured. Standard SELF.ARC works with the PostgreSQL database. If the D2000 application was launched as an XML application that starts from XML files (currently only in read-only mode and without a monitoring database) and the archive would use the SQLite3 database, it would be possible to run a static embedded D2000 application even without a PostgreSQL server.
- All processes with autostart enabled have the startup parameter /E-CONO.FILE.LOG, which disables logging into the file (to save the SD card). If necessary, it is possible to delete or modify this parameter. It can be specified also for the kernel in file /etc/systemd/system/d2000-myapp.service.
Myapp application is configured with running Java (openjdk-8-jre is used). By changing a line
Kernel.UseJava = 1
to
Kernel.UseJava = 0
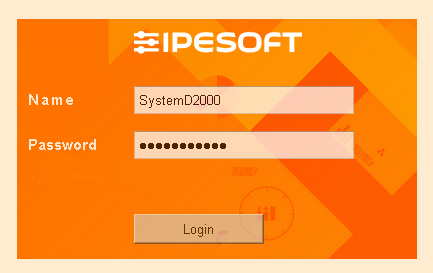
in file /opt/d2000/app/myapp/application.properties and following restart, it is possible to disable Java usage to reduce the memory requirements of the kernel (114 MB → 96 MB according to the output of the command "ps aux -sort -rss")- Myapp application also includes a web application (for a thin client) deployed on a web server. The app can be accessed through the web browser at http: //<raspberry_ip_address>. You must enter a standard username and password (SystemD2000:SystemD2000) and click on the Login button:
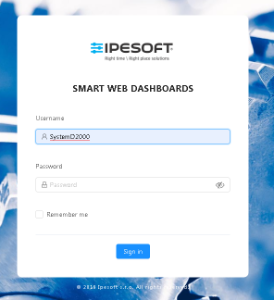
After signing in, the default schema is displayed: - Myapp application also includes a SmartWeb dashboard (for a thin client) deployed on a web server. The app can be accessed through the web browser at http: //<raspberry_ip_address>/dashboards. You must enter a standard username and password (SystemD2000:SystemD2000) and click on the Sign in button:
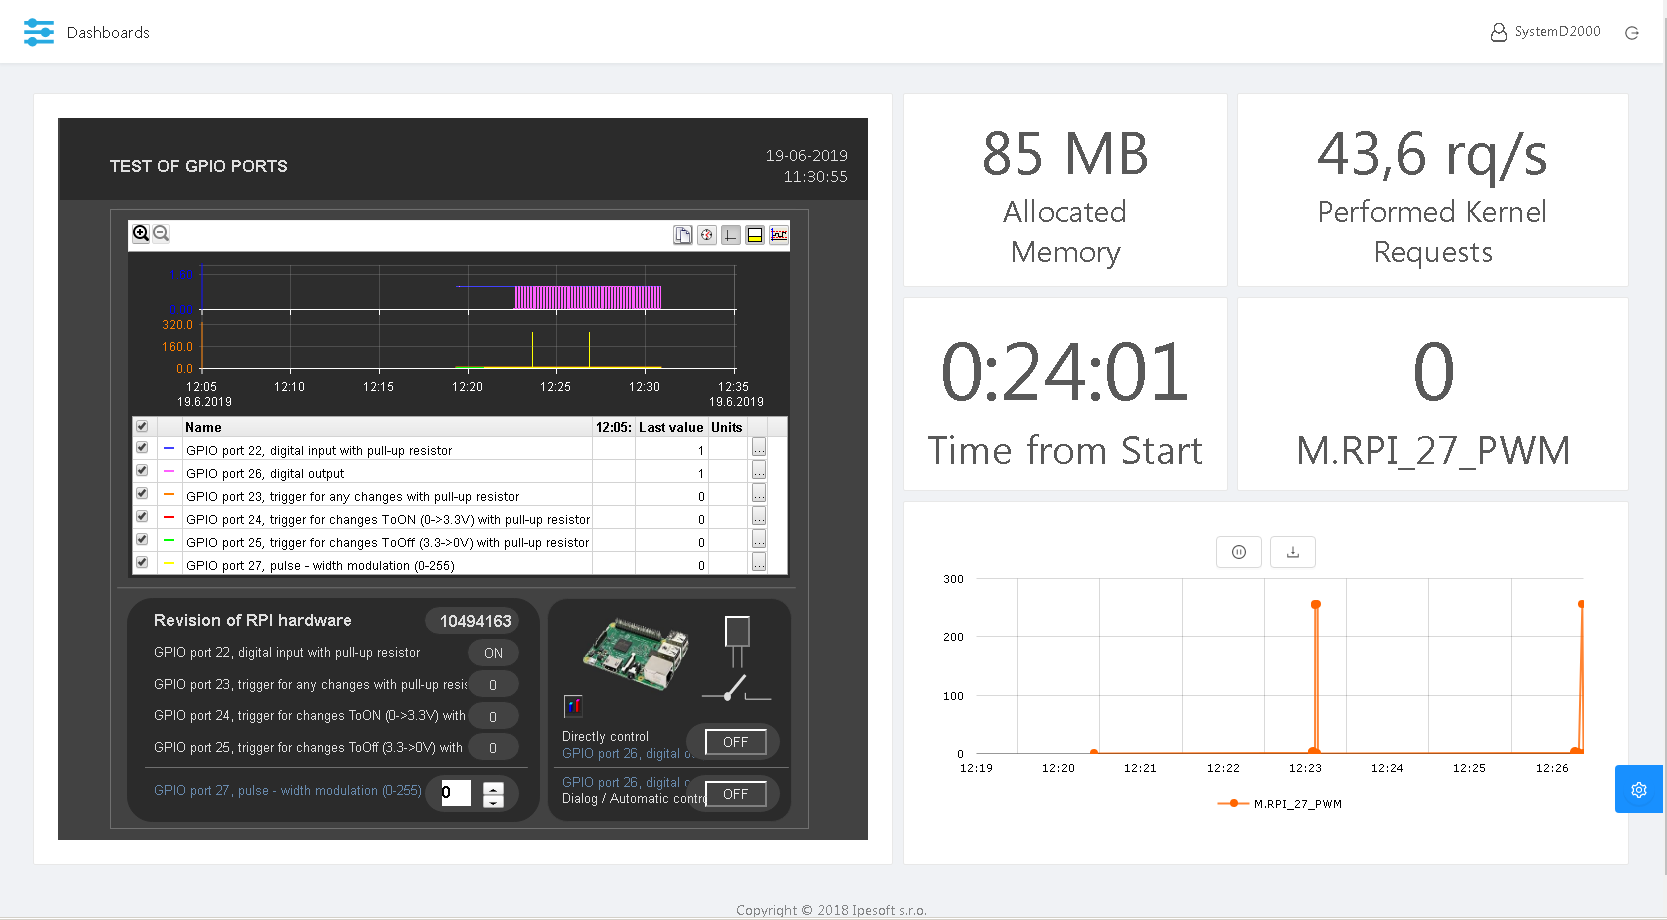
After a successful logon a dashboard is displayed. To modify it, click the blue icon in right bottom part of the web page. - Myapp application also includes an OPC UA server - the SELF.OUS process that has the autostart disabled. When it is started, it loads the configuration file
/opt/d2000/app/myapp/config/proc/self.oua/opcuaserver.conf
For secure communication, it uses a private key
/opt/d2000/app/myapp/config/proc/self.oua/pki/private/private.pem
and a certificate
/opt/d2000/app/myapp/config/proc/self.oua/pki/own/cert.der
If the OPC UA client is used to connect the OPC UA client to port 4840 using encryption, the client will be first denied and its certificate will be stored in /opt/d2000/app/myapp/config/proc/self.oua/pki/rejected directory.
After moving the certificate to /opt/d2000/app/myapp/config/proc/self.oua/pki/trusted, the client will be accepted (restart of OPC UA server is not required).
Client authentication may be either anonymous or a with a user sample using a password sample1 (see definition of sample_user identifier and its use in the opcuaserver.conf configuration file).
The OPCUA_User_SELF user is created in the myapp configuration for the OPC UA server. The OPC UA server has the same access rights to application objects as the OPCUA_User_SELF user (currently, the Home_OPCUA_User_SELF object group defines read-only access to system variables only). - Raspberry PI image does not contain a graphic interface (to keep the image small). If required, it can be installed according to the guide. Installing Raspberry Pi Desktop requires:
sudo apt-get install --no-install-recommends xserver-xorg
sudo apt-get install --no-install-recommends xinit
sudo apt-get install raspberrypi-ui-mods
sudo apt-get install --no-install-recommends raspberrypi-ui-mods lxterminal gvfsthen Google Chrome browser can be installed:
sudo apt-get install chromium-browser
Blog
You can read blogs about D2000 and Raspberry PI:
Pridať komentár