An important graphic object is text. Using such a graphic object allows to insert a text descriptions, explanations, comments etc. into a picture. One of the most important task of text strings is displaying of current (live) values of D2000 system objects. The format of such strings is special - for detailed information see the topic Format masks.
To insert a text into a picture
- In the Drawing toolbar, click the button Text.
- Write required text into the input edit field opened on the screen.
- In the picture, click on the position you want to insert the text.
Note: A text string inserted into a picture can contain up to 250 characters.
Text parameters
For a graphic object of Text type, you can define various parameters such as color, text font, type etc. The parameters are being defined in the palette Object properties.
Text
The input edit field contains a text entered during creating the graphic object. It is possible to change it.
Color
Selection of a text color. Clicking the color sample opens the color palette. Clicking a color in the palette sets the color as the color for the text
Font
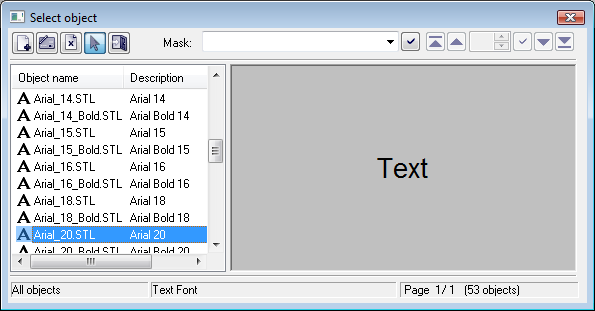
Clicking the button Font opens the dialog box containing a list of defined text fonts. A font, selected from the list will be
used for the ext object. The right side of the dialog box contains a list of defined text fonts and the left side contains the sample of selected text font.
For more information on text fonts see the topic Text fonts.
Type
Definition of a type for placing the text into the picture.
| The text is placed into the graphic picture on the mouse cursor position. | |
| The text is placed in a created rectangle and keeps its proportions according to the definition of the text font. A position of the text in the rectangle is defined using the red square in the rectangle - nine options. | |
| The text is placed in a created rectangle to fill the whole area and doesn't keep its proportions according to the definition of the text font. |
Frame
For the types (in rectangle) and (in all rectangle), it is possible to define a method of drawing the rectangle - frame outlining given text.
| The frame, outlining the text, will not be drawn. | |
| There will be drawn a frame line only. Parameters of the frame line (color, style, width, line join) can be defined in the tab Lines. | |
| There will drawn a frame line and a frame fill. Parameters of the frame line (color, style, width, line join) and frame fill (fill, pattern) can be defined in the tab Lines. |
Direction
Definition of a direction for drawing the text.
| Text is drawn left to right. | |
| Text is drawn bottom-up. | |
| Text is drawn top-down |
Effect
The dropdown box is placed in the corner right bottom of the tab. Selection of a text effect. The following figures show usage of the effects.
| Normal | Normal - no effect |
| Back - text with a background | |
| Shade - shadow effect | |
| Space - space effect | |
| Space 2 - space effect 2 | |
| 3D - 3D effect |
Note: The effect Background will drawn the rectangle of defined text in a color defined in the parameter 2nd color. This color will be also used during displaying the object in D2000 HI - used displayed palette takes no effect on the background defined by this effect.
2nd color
Selection of the color, that is used for text effects.


