| Info | ||
|---|---|---|
| ||
Before installing D2000, we recommend installing the latest patch of the supported version of PostgreSQL database (https://www.postgresql.org/download/windows) as well as PostgreSQL ODBC (https://www.postgresql.org/ftp/odbc/versions/msi) to avoid installing PostgreSQL when installing D2000, which may be out of date. The 64-bit version of D2000 requires 64-bit PostgreSQL ODBC. |
Display the web page https://d2000.ipesoft.com/download/ will be displayed in in the web browser.
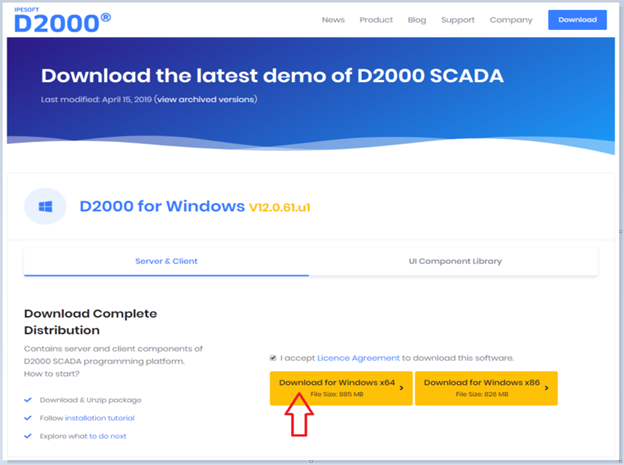
Accept the license agreement and download the 64-bit version of D2000.
...
Run the setup_ips.exe file to start the installation.
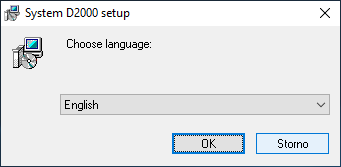
After running starting the installation, a dialogue window dialog box for choosing a language, in which the installation will run, will appear. Choose English.
...
The initial window of the installer guide will open next. It can be controlled by three buttons which enable us to move forward forwards and backward backwards in the dialogue dialog or to cancel the installation altogether.
...
Confirm the license agreement and click the Next button Next.
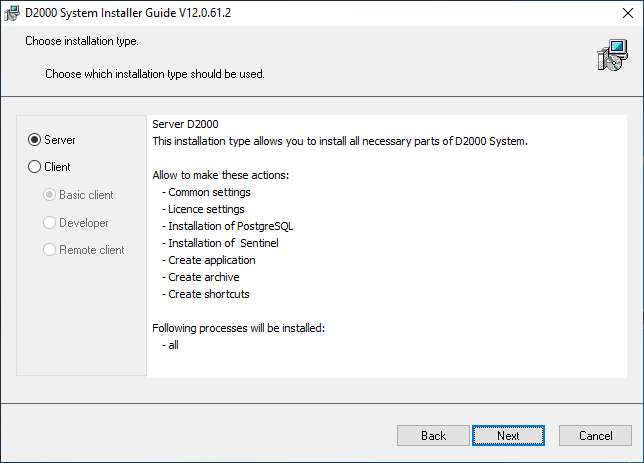
Choose the installation of the Server type installation and click the Next button Next.
Warning: If there are one or more instances of the D2000 system on the computer, there will be a window for instance administration preceding this one.
...
Set the name of the installed instance and the destination directory. Leave the parameter “Creation mode” set as Standard. The given instance name will be used in the Start menu after its installation.
| Info | ||
|---|---|---|
| ||
|
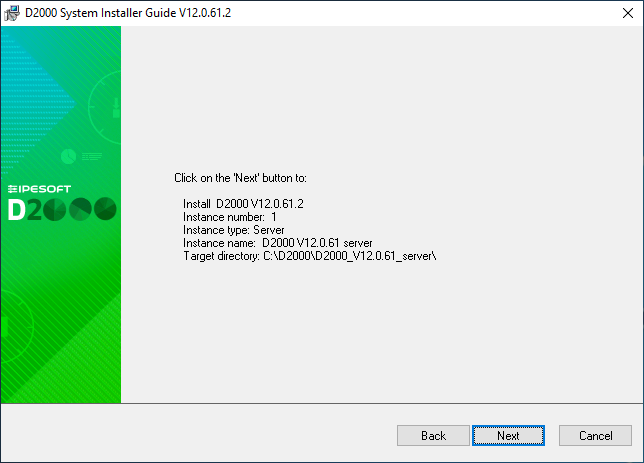
Display A display of summarizing information about the entered parameters is shown. After confirmation, the installation process will run and it can could take some time.
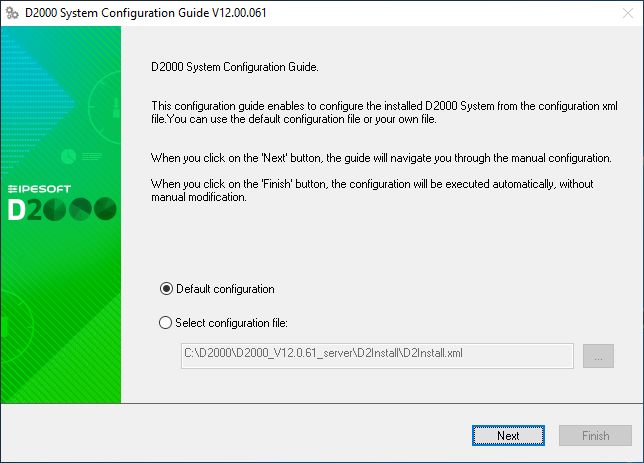
Use the “Default configuration”.
...
It is necessary to install the PostgreSQL database which is used for storing a the configuration of applications. In the case of the Demo version, the support for HW keys, and the choice of the hardware key/software key is not necessaryessential.
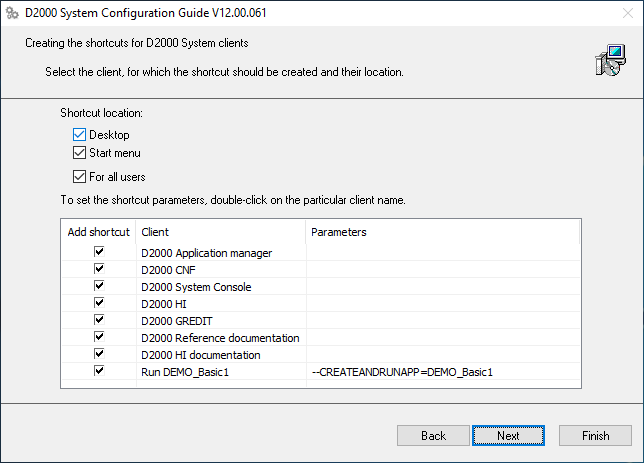
Settings Dialog box shows the settings for the creation of the shortcuts for individual components. In most cases, the default setting is correct.
...
The choice “Run demo application” enables the creating and running of the demo application after the end of the installation. It It is possible to save the set parameters of the installation. The last installation phase will run after clicking the button “Finish”.
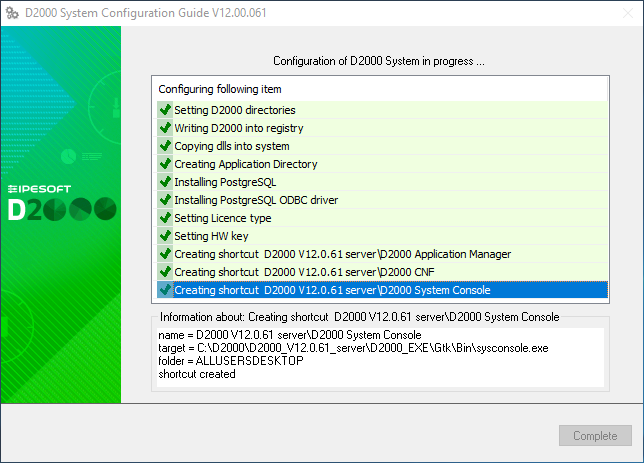
The window box informs about the current running configuration process. Information about the success or failure of this process is shown as well.
...
Now the instance of the D2000 system is installed, configured and ready to be used. After clicking the "OK" button “Ok”, the"Complete" button “Complete” will be available, shown on the previous slide. By clicking the button, the installation will be completed and the DEMO_Basic1 application will be created.
...
Human Interface – D2000 HI will open with the starting scheme S.Welcome. By clicking on the "Explore" button “Explore”, the main summarizing scheme of the DEMO application will open.
...
There are demonstrations and the usage of the basic types of graphic objects displayed in the DEMO application. In the section “Pictures”, there are two examples of practical usage of the graphic objects – in the there is a demonstration scheme of watching that overwatches the process of charging and discharging a battery and technological scheme of a gas station is shown.
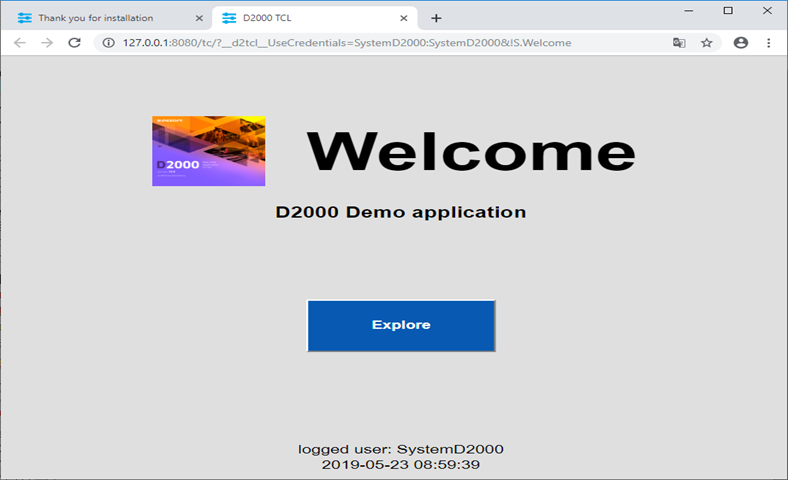
On the other tab of the web browser, there will be a welcoming scheme S.Welcome displayed in the thin client environment. It is the same scheme S.Welcome as is displayed in the D2000 HI window. The description of its functionality and usage is thus , therefore, the same.
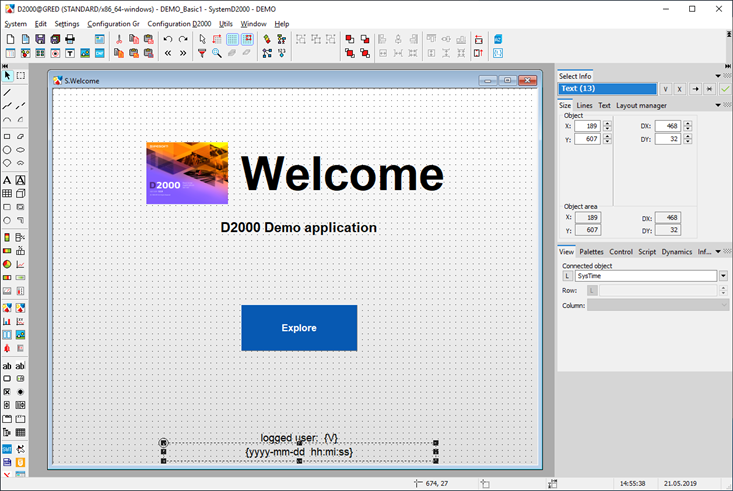
Graphic editor – GR serves for creating visualization and a complete completes the configuration of the application. Currently, it offers configuration of the initial scheme from the previous slide (S.Welcome). If it is changed and saved, the result will be visible in HI (if it is not visible in HI, there is a need to logout and login again).
...
Without a paid license, the application in the DEMO mode will be automatically shut down after an hour. Before that, a system message about the time limitation of the license validity appears. The license will be automatically renewed if parameters of the Internet connection are set correctly and sending of are enabled to send the diagnostic data to the central Ipesoft server is allowed according if done accordingly to the following slide.
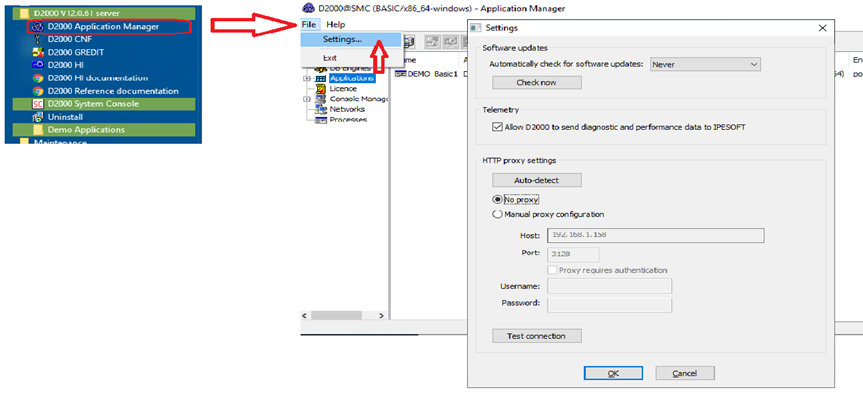
By the choice choosing File/Settings in the Application manager, the Settings window is opened. The correct parameter values of our internet connection can be configured here. The button “Auto-detect” button sets everything automatically. If the proxy server is used, the correct parameters of the proxy server must be entered. The correctness of parameters is tested by clicking the button “Test connection”“Test connection” button.
| Info | ||
|---|---|---|
| ||
Ipesoft D2000 can also be installed manually. For example when migrating from server to server, just copy the installation directory (e.g. D:\D2000) and the registers of the Computer\HKEY_LOCAL_MACHINE\SOFTWARE\Ipesoft branch. If it is necessary to move the directory of the installation directory, it is necessary to make changes in the registry (Log_Dir, Perf_Dir, InstallDir items) in the relevant branch of the installation (more information - see Multiple Installations on One Computer). Warning - if the directory with applications is moved (e.g. D:\D2000\D2000_APP), it is not enough to edit the ApplDir entry in the registry, but:
|