Configuration Guide of the D2000 System
When d2msi starts, it will shown the welcome dialog.

The structure of the configuration tool is similar to the installer. You may use the "Next" and "Back" buttons when you go through the configuration dialog windows. The "Install" button runs the final configuration.
License Agreement
After the welcome dialog, we are shown the license agreement, before we can proceed to configuration of our installation.

Type of Installation
In the next dialog, we can choose what type instance are we going to install.

In the left part, you may choose a type of installation that ensures installing of all necessary elements. Their short description is displayed in the right part.
Configuration
Each type of installation requires different system settings. Therefore, the installation guide is different for each installation. The steps of the configuration depend on the type of installation and on checked parameters in individual dialogs.
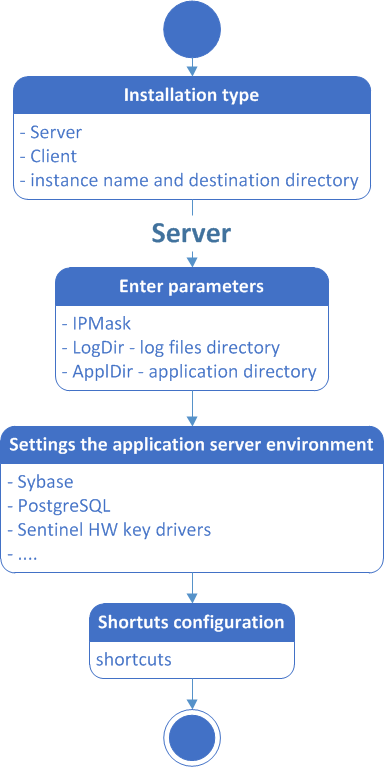
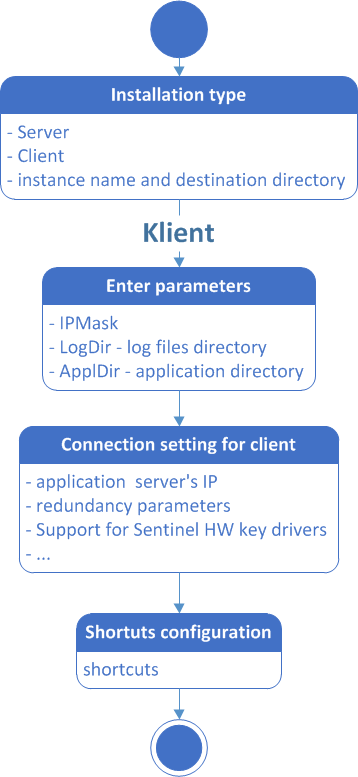
Each rectangle represents one or more configuration dialogs for the setting of system parameters. The configuration proceeds according to the arrows. The upper point represents the start position, i.e. the configuration dialog in which you have to choose a type of installation. The endpoint represents a final configuration as per the settings.
Configuration guide
1. Basic settings (all types of installation)

In this dialog window, you define the path to the basic directories necessary for the D2000 System operation:
- Application – the directory to which all files necessary for the application will be stored.
- Logging – the directory that will contain information about the activity of processes.
2. Server settings (Server)

Support programs
The dialog is used to set up the installation of support programs necessary for running some parts of the D2000 system. If the option to install a program is checked, the program will be installed after the configuration is completed. If an item is checked and disabled, it means that the program is present on your computer and no further installation is required.
3. Connection settings (Client)
Requires the setting of connection to the D2000 server. This is either an IP/Computer name or a name of the redundant group. This setting will be used for all configured clients.

4. Creating the shortcuts
This dialog box sets the presence and location of links to important D2000 processes. All links that have the "Add link" check box selected will be added to the resulting configuration. The link location setting is applied to all clients that have this parameter checked.
If no parameter is selected under the "Location" or "Add link" section, no link will be added to the computer.
A click on a button for particular client process opens a dialog window in which the user may change its start parameters.

5. Installation
After confirming our configuration we can start the installation.

6. Installation of supporting programs
After the installation, another installation of supporting programs will start, if we picked the option for it in the configuration.
In this case a dialog with a message will pop up on the screen, that will close itself when the installation of those programs ends.

7. Configuration of KOM and ARCHIVE processes (remote client)
After the installation of remote client, scsconfig.exe will be run, for you to configure processes for remote client.

Related pages:
Pridať komentár