...
| Info |
|---|
This chapter describes the window with the new alarm management user interface interfaces functional from version D2000 12.2. If required, the the D2000 HI can be started with the original alarm user interface via the /OLDUI command line parameter |
...
All alarm panels share a lot of common functionality, whether it's a hideable filter on the left side of the panel, an alarm/event detail on the right, or control of the table and its context panel located above the table. For this reason, the following subchapters are organized to describe the common functionality in one place and thus not to repeat the same description unnecessarily several times.
...
The panel of active alarms displays all currently active alarms in the system (light red text), in a special case also alarms that are already inactive but require confirmation (so-called mandatory acknowledged alarms). In the table, such alarms are displayed in blue text. An acknowledged alarm that is still active is displayed in dark red. Active alarms can be acknowledged either by double-clicking on a row in the table or by clicking the "Confirm" button at the bottom of the active alarms panel. This button is active if at least one selected alarm can be acknowledged. Next to the acknowledge button, there are also the "Block" and "Pause" buttons, which change the status of the selected alarms to blocked - basically, these alarms will be lost from the active alarms panel and will appear in the blocked alarms panel.
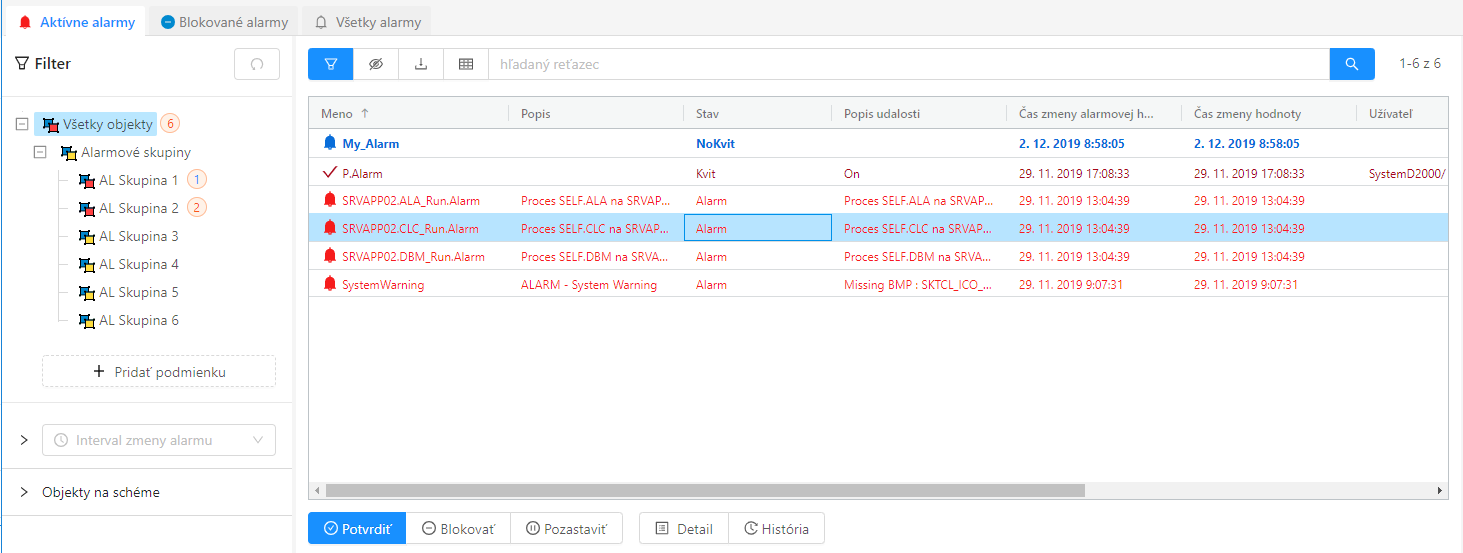 The In the active alarms panel, the first alarm in the table is inactive but still requires confirmation, the second is acknowledged but still active, and the remaining alarms are actively unacknowledged.
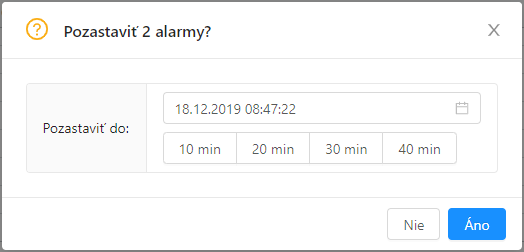
Dialog The dialog is triggered by the "Pause" button to pause selected alarms until a certain time. Below the time selector are buttons for quickly setting the lock time to 10, 20, 30, and 40 minutes.
In addition to the status and alarm buttons, the "Detail" and "History" buttons are present at the bottom of all alarm panels. The "Detail" button opens in the right part detail of the selected alarm with the possibility to display all schemes on which the object belonging to the alarm is used. The "History" button displays a separate monitoring dialog with a preset filter for the object selected in the table.
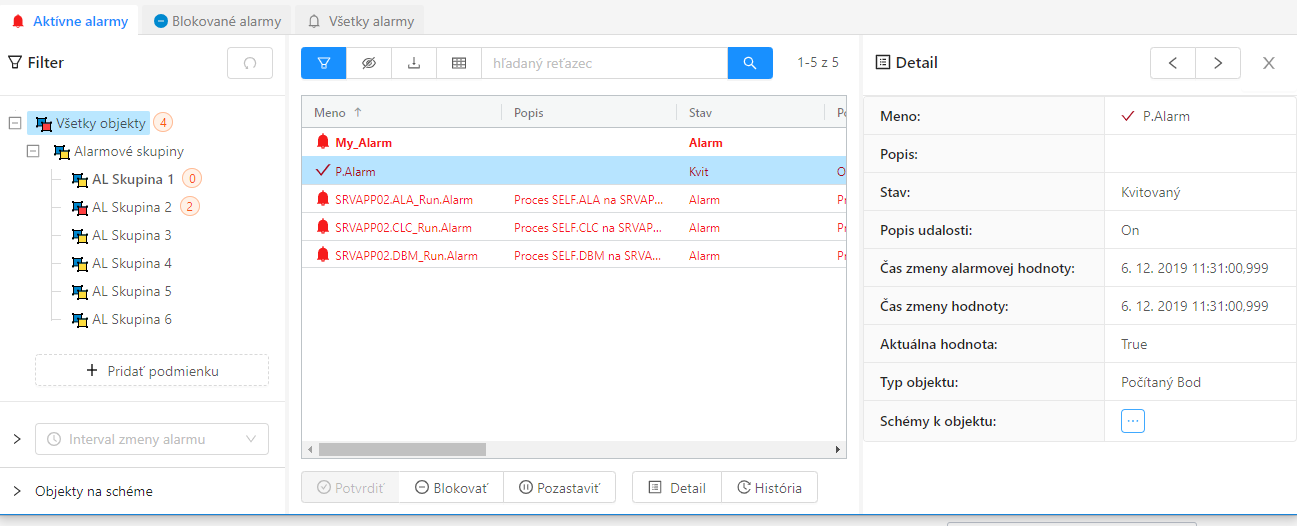 After pressing the "Detail" button, the detail of the selected alarm will be displayed in on the right part of the screen.
After clicking the ![]() button button next to the Object schemas item, the list of schemas on which the given object (in this case P.Alarm) is located will be displayed.
button button next to the Object schemas item, the list of schemas on which the given object (in this case P.Alarm) is located will be displayed.
...
The panel of active alarms, and selected alarms can be unlocked via the button below the table.
...
The alarm window configuration is not automatically saved in the computer's registry as with other windows. Nonetheless, it is possible to explicitly set this configuration for the user, so that this setting is consistent for him on all computers. The current window settings can be saved or exported in the advanced window settings. However, the save button of the window settings window is allowed only to administrators or users who have the configuration allowed to save alarms (checked checkbox "Change alarm window parameters" on the user's mask). The button to export the window configuration to a file is enabled for everyone. Such a file can then be imported in into the user settings (item Alarm window configuration). This means that e.g. the administrator can set the same default alarm window configuration for multiple users.
...